WP Ghost works on Windows IIS (Internet Information Services) servers with manual configuration. IIS uses web.config for URL rewriting instead of .htaccess (Apache) or Nginx config files. After activating WP Ghost, you need to copy the rewrite rules WP Ghost generates and add them to your site’s web.config file, then restart IIS. WP Ghost detects IIS and generates the correct rewrite rules format automatically. This guide walks through the complete setup.
Why IIS Requires Manual Configuration

On Apache and LiteSpeed servers, WP Ghost writes rewrite rules to .htaccess automatically. On standard Nginx servers, WP Ghost writes to hidemywp.conf. Windows IIS uses a different rewrite system: the web.config XML file with IIS URL Rewrite Module rules. WP Ghost can’t write to web.config automatically on most IIS configurations, so it generates the rules and displays them for you to copy and paste. The IIS URL Rewrite Module must be installed on your server for these rules to work.
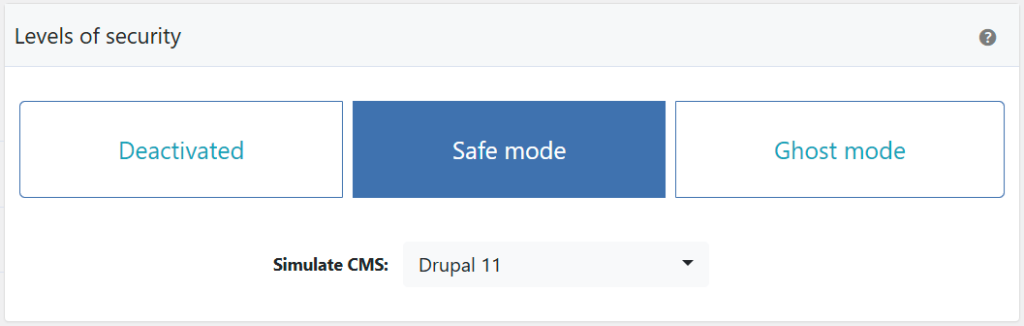
Step 1: Activate Safe Mode or Ghost Mode
- Go to WP Ghost > Change Paths > Level of Security.
- Select Safe Mode or Ghost Mode.
- Customize paths as desired.
- Click Save.
After saving, WP Ghost displays a notification with the IIS rewrite rules you need to add to web.config.
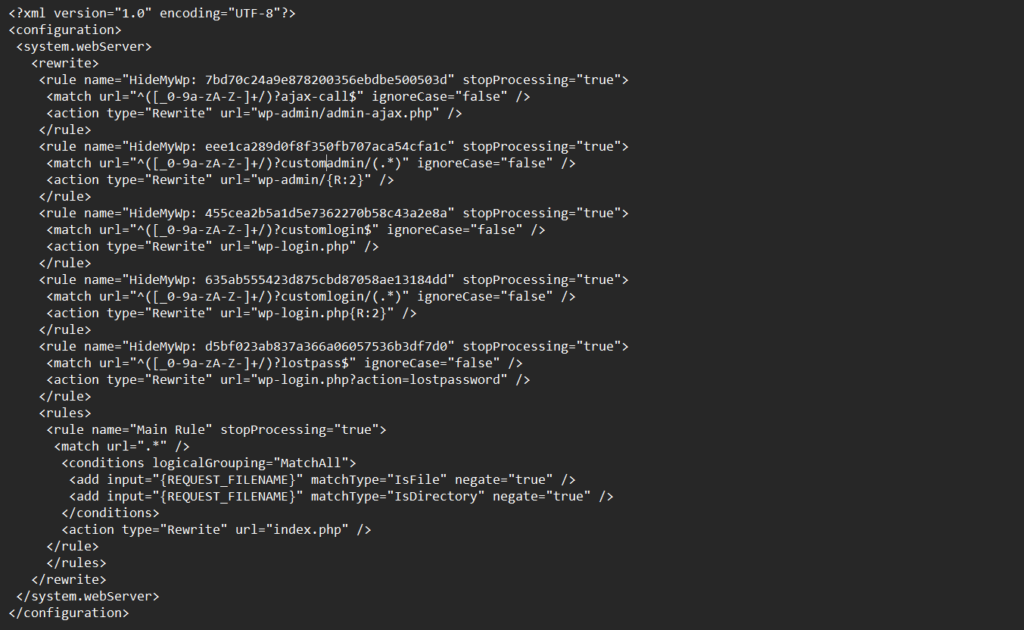
Step 2: Add Rewrite Rules to web.config
- Copy the rewrite rules from the WP Ghost notification.
- Open the
web.configfile in the root directory of your WordPress installation. - Add the WP Ghost rewrite rules inside the
<system.webServer>section, within the<rewrite><rules>block. - Save the
web.configfile.

Do not log out until you’ve completed all steps including the IIS restart. If you log out before the rewrite rules are active, you won’t be able to access the admin dashboard through the new login path. Keep your current session open until the Frontend Test confirms everything works.
IIS URL Rewrite Module required. The IIS URL Rewrite Module must be installed on your Windows server for these rules to work. This module is not included in IIS by default. Download it from the Microsoft IIS URL Rewrite Module page if it’s not already installed.
Step 3: Confirm in WP Ghost and Restart IIS
- Go back to WP Ghost in your WordPress dashboard.
- Click “Okay, I set it up” to confirm the rules are in place.
- Open IIS Manager on your Windows server.
- Select your server in the left-hand Connections pane.
- In the right-hand Actions pane, click Restart.

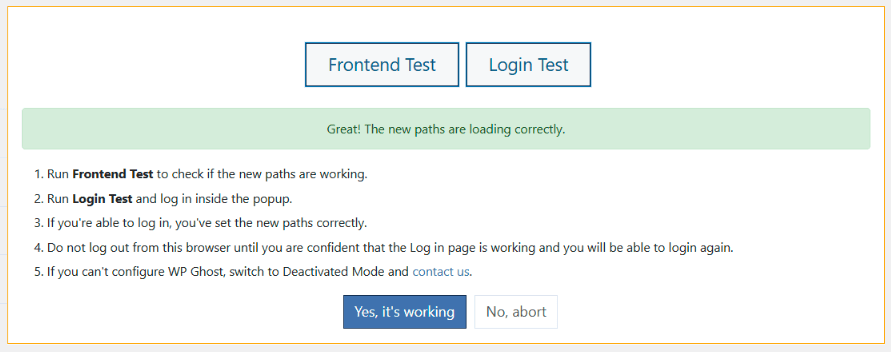
Step 4: Run the Frontend Login Test
- After IIS restarts, go back to WP Ghost and run the Frontend Login Test.
- Check that the frontend and login pages load correctly with the new paths.
- Also verify in a different browser or incognito window.
- If everything loads correctly, click “Yes, it’s working”.
- If something is broken, click “No, abort” to roll back to previous settings.
Troubleshooting
Custom paths return 404 errors
The IIS URL Rewrite Module may not be installed. Download and install it from the Microsoft IIS URL Rewrite Module page. After installing, restart IIS and test again. If the module is installed, check that the rewrite rules are placed correctly inside the <system.webServer><rewrite><rules> section of web.config.
web.config XML syntax error
If IIS returns a 500 error after editing web.config, there’s an XML syntax issue. Common causes include unclosed tags, duplicate sections, or pasting rules outside the correct XML block. Remove the WP Ghost rules, restart IIS to restore normal operation, then re-add them carefully. Use a text editor with XML validation to catch syntax errors before saving.
Locked out after saving WP Ghost settings
You saved WP Ghost settings before the IIS rewrite rules were in place. Access web.config via Remote Desktop or file share and either add the correct rewrite rules or remove the WP Ghost rules to restore the default paths. Alternatively, use the Safe URL parameter to bypass WP Ghost temporarily, or see the Emergency Disable guide.
Need to update paths after initial setup
Every time you change paths in WP Ghost, you need to update the rewrite rules in web.config and restart IIS. WP Ghost displays the updated rules after saving. Replace the old rules with the new ones in web.config, save, and restart IIS.
Frequently Asked Questions
Do I need the IIS URL Rewrite Module?
Yes. The IIS URL Rewrite Module is required for WP Ghost’s rewrite rules to work on IIS. It’s not included in IIS by default. Download it from Microsoft’s IIS downloads page. Without this module, IIS ignores the rewrite rules and custom paths won’t work.
Can WP Ghost write to web.config automatically?
On most IIS configurations, no. WP Ghost generates the IIS-formatted rewrite rules and displays them for you to copy into web.config manually. This is because web.config permissions and the XML structure vary across IIS installations, making automatic writing unreliable.
Do I need to edit web.config every time I save WP Ghost?
Only when you change path settings. If you change a custom login path, plugin path, or any other path setting, you need to update the rewrite rules in web.config and restart IIS. Saving other WP Ghost settings (firewall, brute force, 2FA) doesn’t require web.config updates.
Does WP Ghost modify WordPress core files?
No. On IIS, WP Ghost uses WordPress hooks for application-level path changes and relies on web.config rewrite rules for server-level redirects. No core files are modified. Deactivating WP Ghost restores all defaults instantly (though you should also remove the rewrite rules from web.config).
Related Tutorials
WP Ghost on other server environments:
- Custom Nginx Config File – Setup for Nginx servers.
- Set AllowOverride All on Apache – Setup for Apache servers.
- Flywheel Server Setup – Another managed hosting setup guide.
- Safe URL Parameter – Bypass WP Ghost temporarily if needed.
- Emergency Disable – Recovery if rewrite rules cause issues.