WP Ghost works on WP Engine managed hosting with manual rewrite rule configuration. WP Engine doesn’t support .htaccess files or direct Nginx config editing. Instead, WP Engine provides a Web Rules Engine in their User Portal where you add rewrite rules through a web interface. After activating WP Ghost, you copy the rewrite rules it generates and add them to WP Engine’s Web Rules. You can add rules one at a time or use the bulk upload feature.
Why WP Engine Requires Extra Setup

WP Engine uses a proprietary hosting stack that doesn’t support .htaccess files. WP Ghost normally writes rewrite rules to .htaccess (Apache) or hidemywp.conf (Nginx), but neither works on WP Engine. Instead, WP Engine offers a Web Rules Engine in their User Portal where you configure rewrite rules through a web interface. WP Ghost detects WP Engine and generates the rules in the correct format for you to copy into the Web Rules interface.
Step 1: Configure WP Ghost
- Go to WP Ghost > Change Paths > Level of Security.
- Select Safe Mode or Ghost Mode and customize paths.
- Click Save.
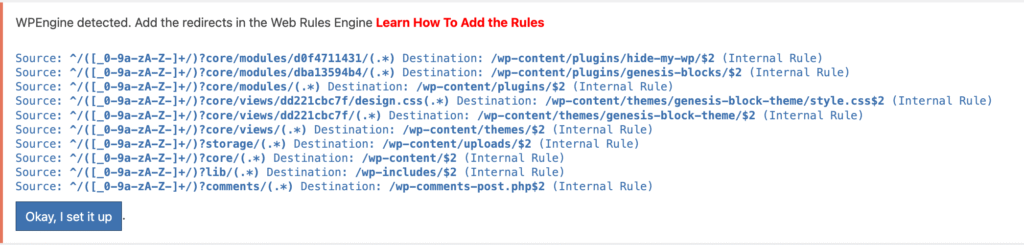
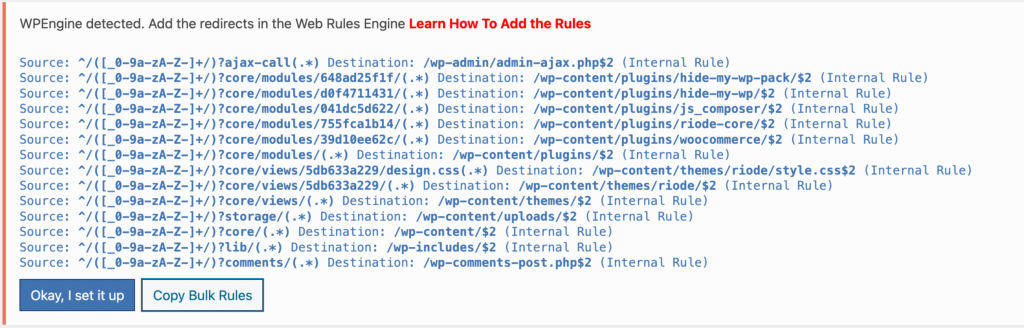
- WP Ghost displays the rewrite rules you need to add to WP Engine.
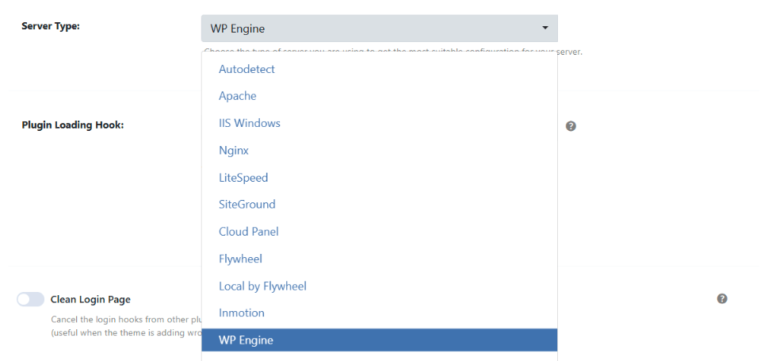
Don’t see the WP Engine notification? Go to WP Ghost > Advanced > Compatibility > Server Type and select WP Engine. Save, then go back to Change Paths and save again. WP Ghost now generates rules in the WP Engine format.

Step 2: Add Rewrite Rules in WP Engine
Add each rule to WP Engine’s Web Rules Engine one at a time:
- Log in to your WP Engine User Portal.
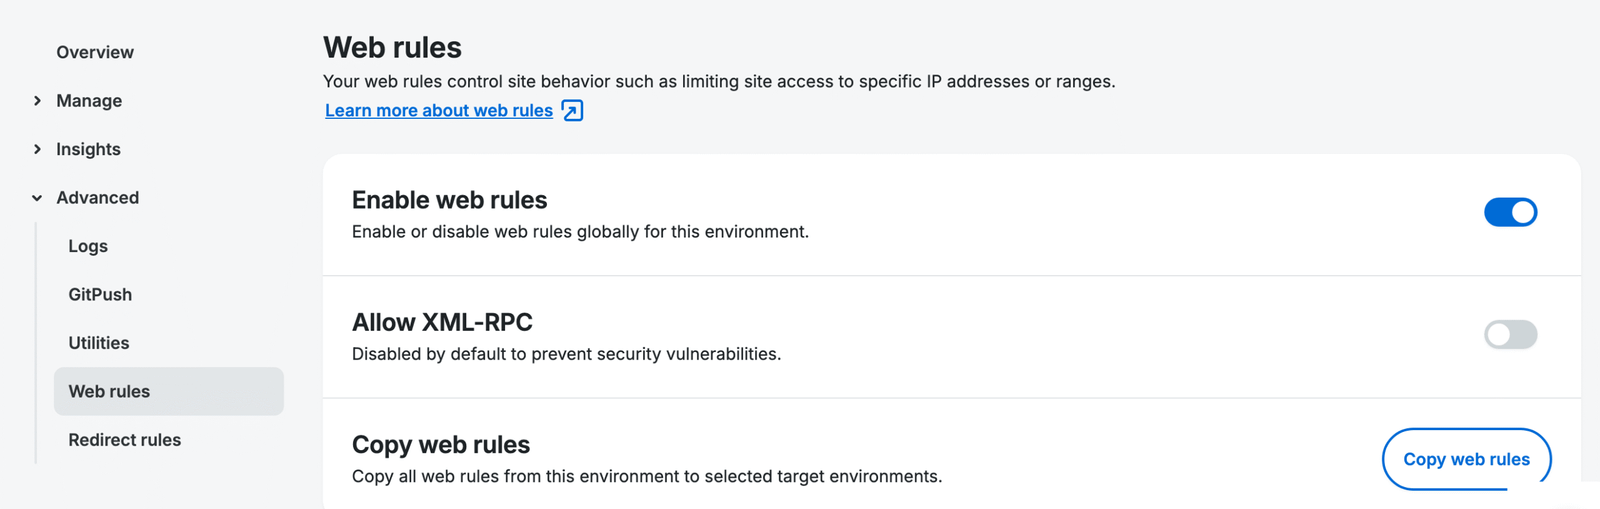
- Select your site and go to Advanced > Web Rules.
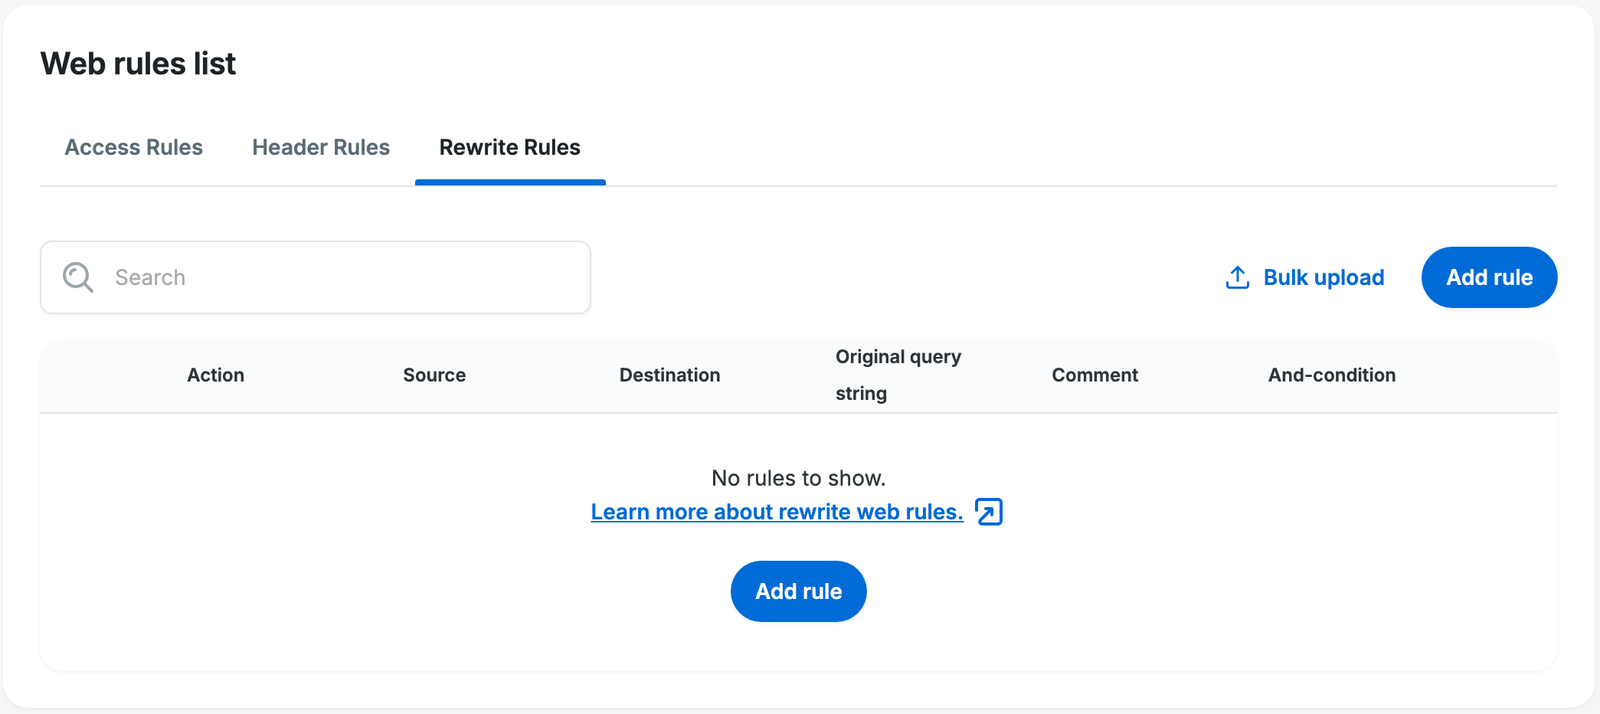
- Click the Rewrite Rules tab.
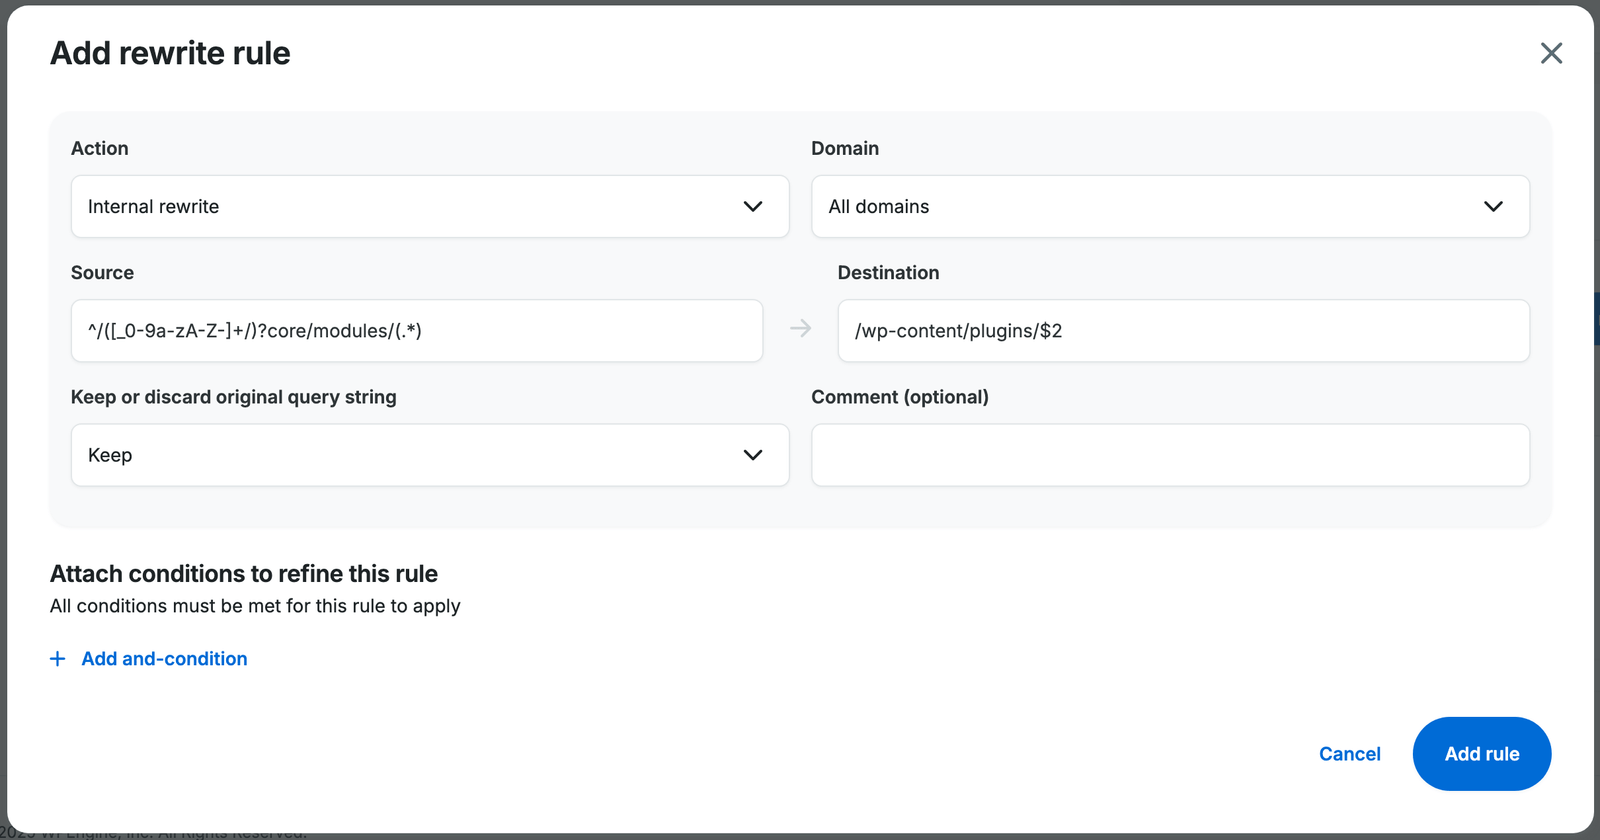
- Click Add Rule.
- Set the action to Internal Rewrite.
- Enter the Source and Destination from the WP Ghost notification.
- Set the query string option to Keep.
- Click Add Rule to save.
- Repeat for each rule from the WP Ghost notification.
Alternative: Bulk Upload Rules
If you have many rules, the bulk upload feature is faster than adding them one at a time:
- In the WP Ghost notification, click Copy Bulk Rules to copy all rules at once.
- Paste them into a plain text file (for example,
ghost-rules.txt) and save it. - In the WP Engine User Portal, go to Advanced > Web Rules > Rewrite Rules.
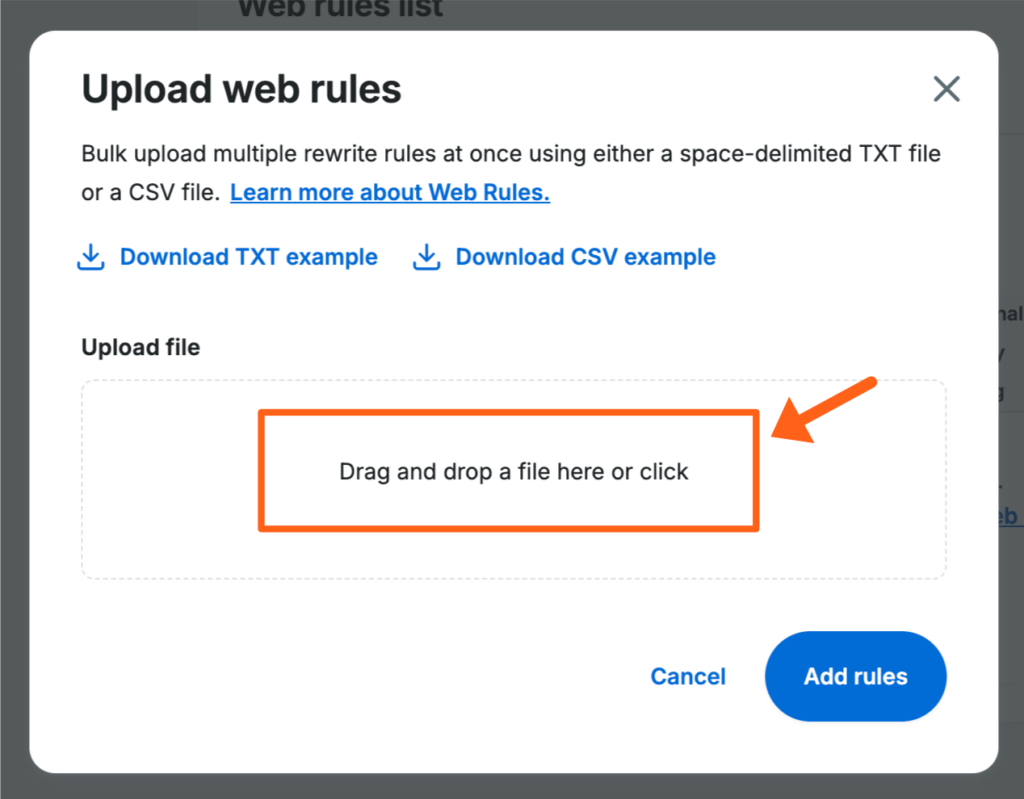
- Click the Bulk Upload link.
- Select your
ghost-rules.txtfile. - Click Add rules to upload.
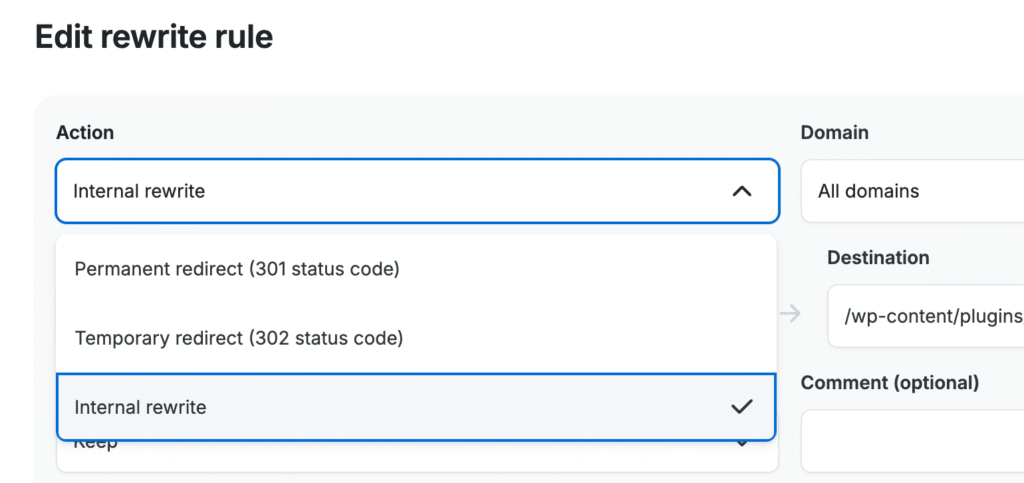
After bulk upload, change each rule’s action to Internal Rewrite. The bulk upload feature does not set the action automatically. You need to edit each uploaded rule and change the action from the default to Internal Rewrite. Without this step, the rules won’t work correctly.
Troubleshooting
Custom paths return 404 after adding rules
Check that every rule’s action is set to Internal Rewrite (not Redirect or another action type). If you used bulk upload, this needs to be changed manually for each rule. Also verify the query string option is set to Keep.
WP Ghost notification doesn’t show WP Engine rules format
WP Ghost hasn’t detected WP Engine as the server type. Go to WP Ghost > Advanced > Compatibility > Server Type, select WP Engine, and save. Then go back to Change Paths and re-save to regenerate the rules in the correct format.
Need to update paths after initial setup
Every time you change paths in WP Ghost, you need to update the corresponding rules in WP Engine’s Web Rules. Remove the old rules and add the new ones from the updated WP Ghost notification. The bulk upload feature can speed this up.
Locked out after configuration
Use the Safe URL parameter to bypass WP Ghost temporarily. If that doesn’t work, see the Emergency Disable guide to deactivate via SFTP. WP Engine provides SFTP access through the User Portal.
Frequently Asked Questions
Do I need to update WP Engine rules every time I change WP Ghost paths?
Yes. WP Engine’s Web Rules are managed through their User Portal, not through files that WP Ghost can update automatically. Every path change in WP Ghost requires updating the corresponding rules in WP Engine. Non-path settings (firewall, brute force, 2FA) don’t require rule updates.
Can I use WP Ghost without adding Web Rules?
Yes. WP Ghost’s custom login paths, brute force protection, firewall, 2FA, security headers, and version hiding all work without Web Rules. Only full path security for wp-content, plugins, themes, and uploads requires the Web Rules configuration. See Use WP Ghost on Nginx Without Config Changes for the no-config approach.
Why Internal Rewrite and not Redirect?
Internal Rewrite maps the custom path to the original WordPress path internally without changing the URL in the browser. A Redirect (301/302) would change the URL, which defeats the purpose of path security because the browser would show the original WordPress path. Always use Internal Rewrite for WP Ghost rules.
Does WP Ghost modify WordPress core files?
No. On WP Engine, WP Ghost uses WordPress hooks for application-level path changes and relies on WP Engine’s Web Rules for server-level rewrites. No core files are modified. Deactivating WP Ghost restores all defaults instantly (though you should also remove the Web Rules).
Related Tutorials
WP Ghost on managed hosting platforms:
- Nginx Without Config Changes – For features that work without Web Rules.
- Flywheel Server Setup – Another managed hosting with redirect tool approach.
- Kinsta Server Setup – Another managed Nginx hosting guide.
- Safe URL Parameter – Bypass WP Ghost temporarily if needed.
- Emergency Disable – Recovery via SFTP if needed.