Table of Contents
Please follow this tutorial step by step to set up the WP Ghost for IIS server:
Select Safe Mode or Ghost Mode
- In your WordPress dashboard, go to Hide My WP > Change Paths.
- Choose between Safe Mode or Ghost Mode based on your preference.
- Customize the paths as desired.
- Click the Save button to apply your changes.

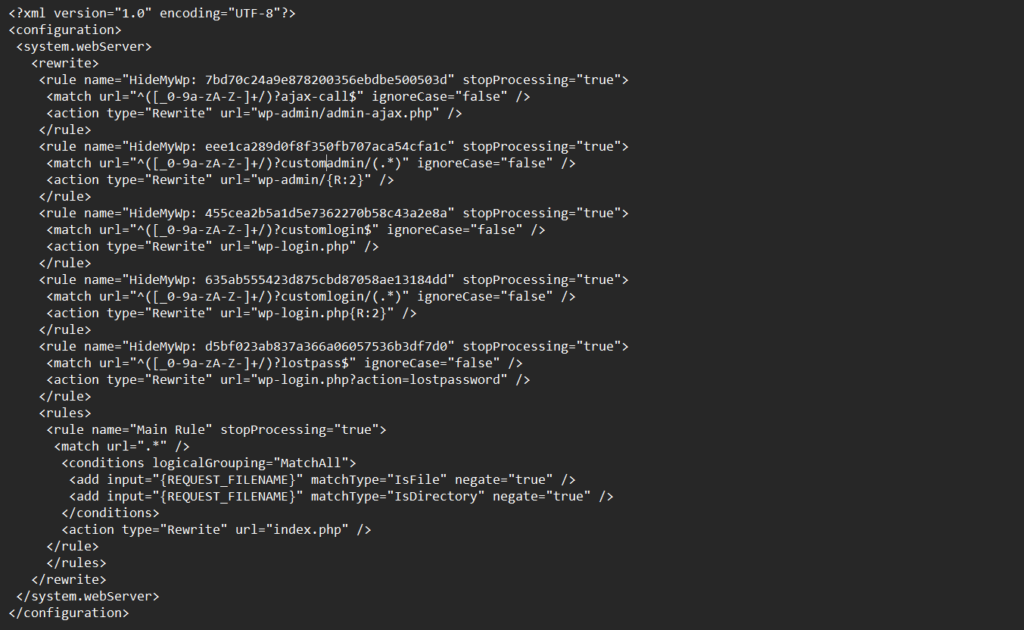
Edit Rewrite Rules In ‘web.config’

- Open the
web.configfile in the root directory of your website. - Add the rewrite rules provided by WP Ghost to your
web.configfile. - The file should look something like this after adding the rules:

Save and Apply Changes
- Save the
web.configfile after adding the necessary lines. - Go back to your WP Ghost settings in WordPress.
Reload the IIS Server
You need to reload the IIS server to apply the changes.
- Open IIS Manager.
- Select your server in the left-hand Connections pane.
- In the right-hand Actions pane, click Restart.

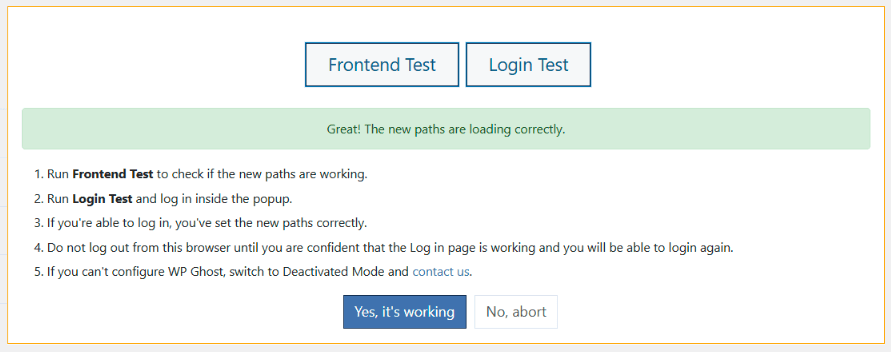
Test New Paths & Settings
- Perform a Frontend Test to ensure the paths are loading correctly. Also, visit your website and check if the paths are working as intended.
- If there are any issues, click No, abort to roll back to previous settings.

By following these steps, you will have successfully set up WP Ghost on your IIS server, enhancing the security of your WordPress site.