This tutorial will teach you how to install the premium version of the WP Ghost plugin, activate the license token on the website, and activate Ghost Mode with predefined paths.
Download WP Ghost Premium
Connect to your WP Ghost dashboard account and download WP Ghost premium plugin
Install WP Ghost
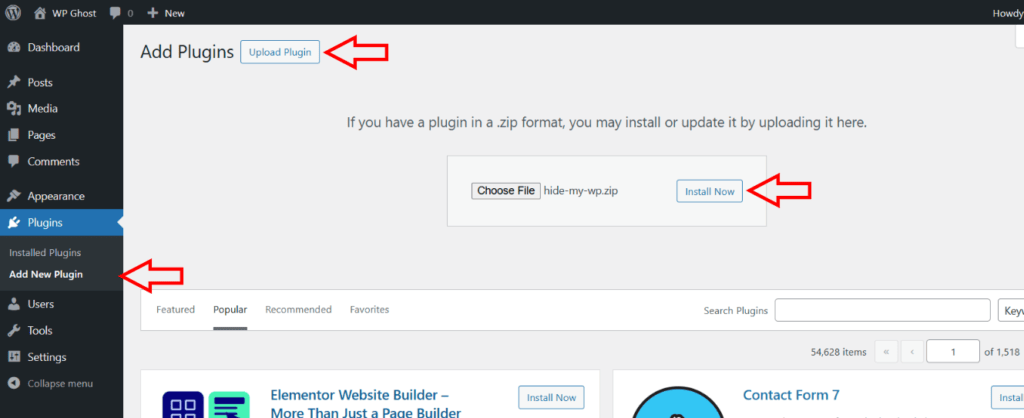
- Log In as an Administrator on your WordPress dashboard.
- Click to browse and upload the hide-my-wp.zip file.
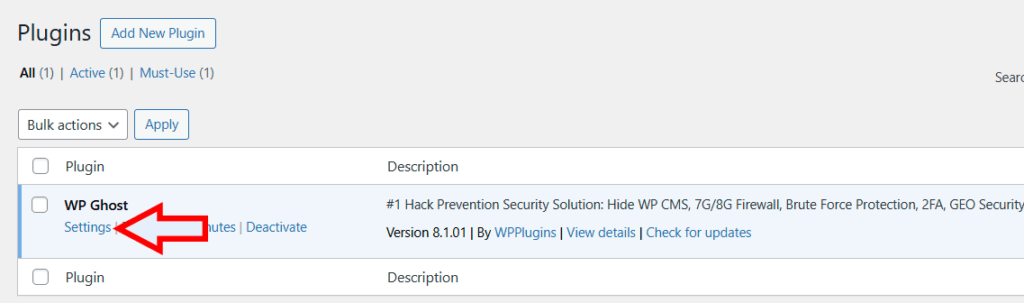
- From the plugins list, click on the Settings link to go to plugin’s settings.
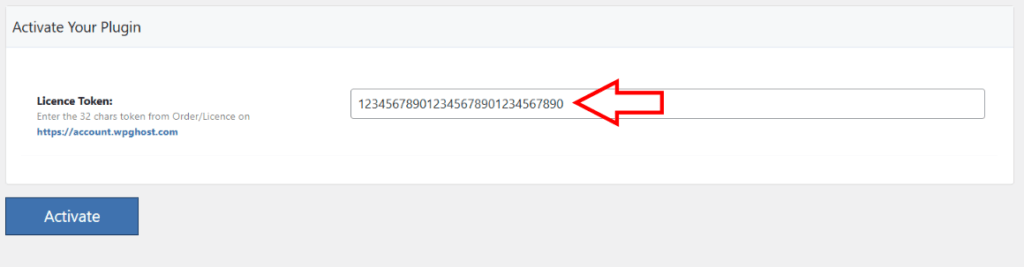
- Now enter the Activation Token from your account into the activation field.
- Click to activate and start the plugin setup.
Once you’ve activated the plugin, click on the Settings link to go to WP Ghost Settings page.
Activate WP Ghost Token License
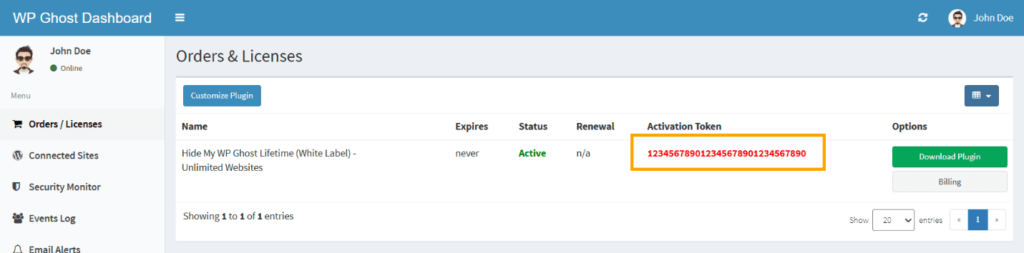
It’s time to activate the premium plugin with the activation token from your WP Ghost dashboard account.
- Copy the activation token from your account.
- Paste the token into the activation field of the WP Ghost plugin.
Activate Ghost Mode Settings
Once you activate the plugin, you will be redirected to the WP Ghost > Overview page, where you will see all the features you can activate with just one click.
Before activating any feature, let’s activate the Ghost mode with the predefined paths.
- Go to WP Ghost > Change Paths > Level of Security.
- Select the Ghost Mode and check the popup information.


Customize Paths
After you confirm the Ghost Mode, the paths will be automatically changed with the predefined ones.
Now you can customize the paths as you desire.
- Admin Security – customize and hide the wp-admin path (optional). more details
- Login Security – customize and hide the wp-login.php path. more details
- Ajax Security – customize the admin-ajax.php path in frontend. more details
- WP Core Security – customize and hide the WordPress common paths and files. mode details
- Plugins Security – customize the plugins path and names in frontend. more details
- Theme Security – customize the themes path and names in frontend. more details
- API Security – customize and hide the REST API path and XML-RPC. more details
- Firewall & Headers Security – add Headers Security and Firewall protection. more details
Note! You have to remember the new login path because you will have to access it directly every time you connect to your website.
After customizing the paths, click the Save button to apply the changes.
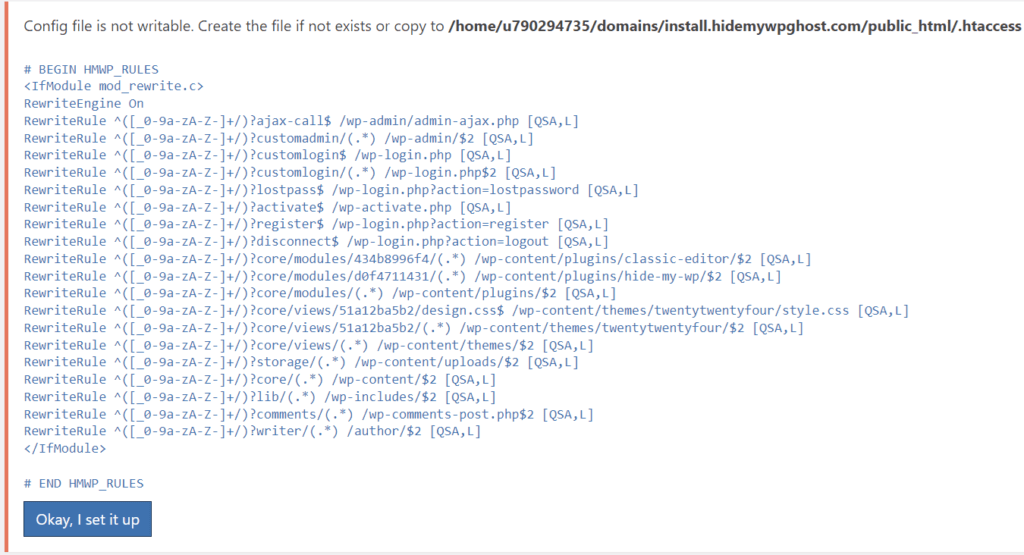
Server Configuration
If WP Ghost can’t write the rewrite codes on your config files (.htaccess for Apache, nginx.conf for Nginx, web.config for IIS), you will be asked to do this manually.
Follow the instructions and click the Okay, I set it up button
If you installed the plugin on Nginx Server you need to have access to nginx.conf file or to have a managed hosting plan.
You need to add the config line in Nginx and restart the server only for the first time. All the rewrite rules are present in the hidemywp.conf file.
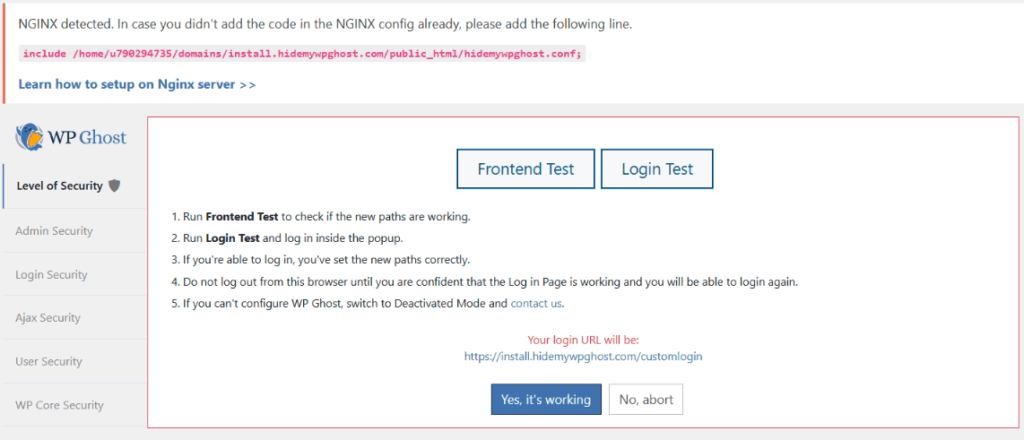
Learn how to include the config line in Nginx File
Note! For Nginx Servers, you need to restart Nginx after each customization with the command:
sudo nginx -s reload
Set AllowOverride all on Apache Servers
Note! For Apache Servers, you need to make sure you set the AllowOverride All option for your current directory in httpd.conf or apache2.conf.
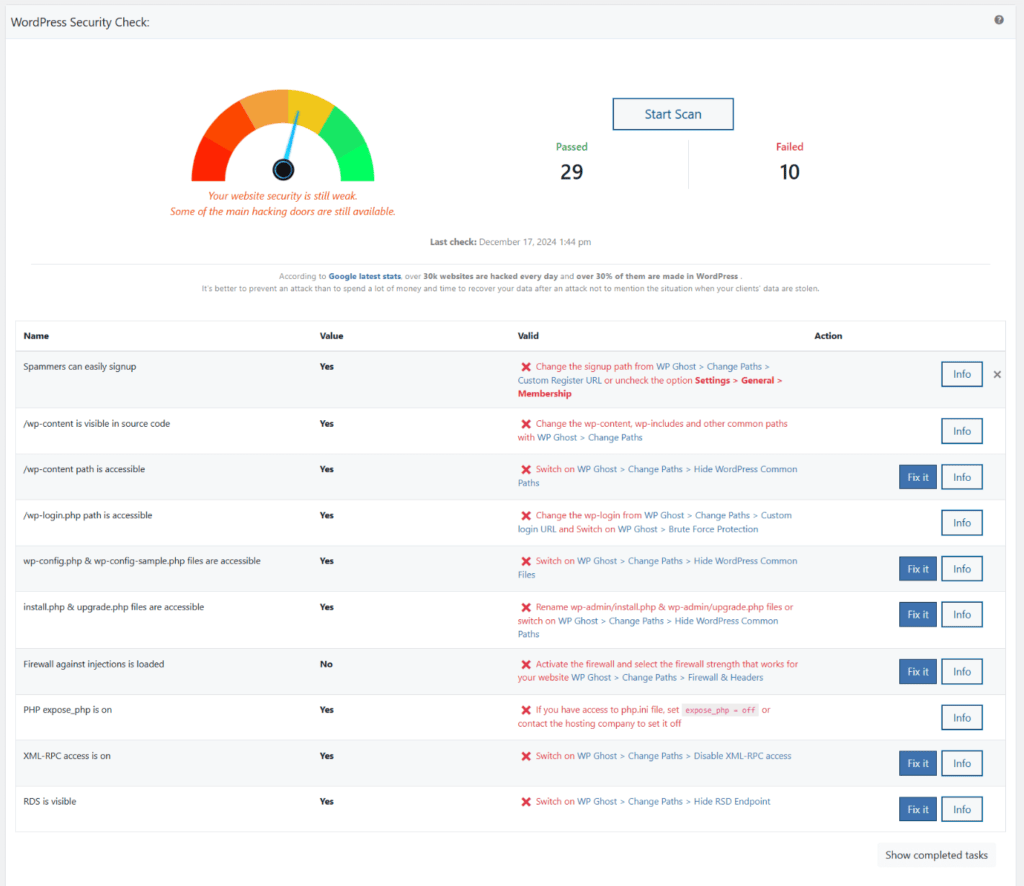
Security Check
Go to Security Check section and run a test to make sure all the settings and tweaks are set correctly.
You can automatically fix them by clicking the Fix it button.
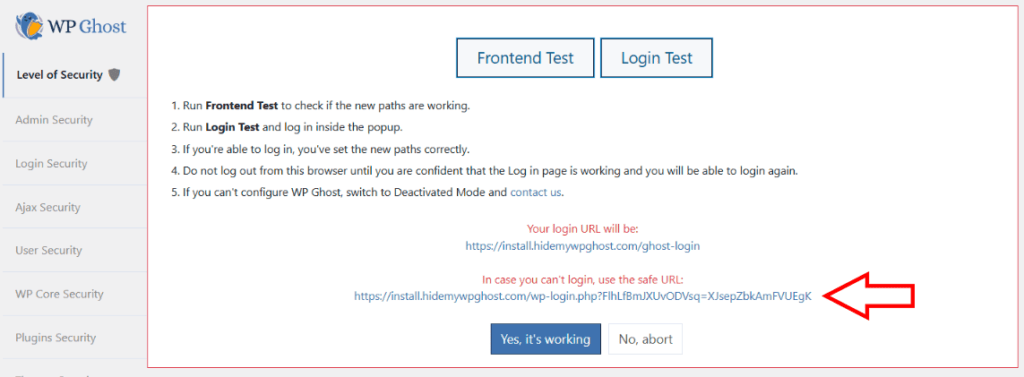
Remember to copy the Safe URL from WP Ghost > Change Paths to avoid the lockout if there is any compatibility issue with other plugins or theme. The Safe URL will pass the custom login path and allow you to login with the default WordPress login path.
In case you can’t login please follow these steps: WP Ghost – Disable it in case of error