
- What Is the Uploads Path in WordPress?
- Why You Need to Secure the Uploads Path
- How to Secure the Uploads Path with WP Ghost
- What Happens After You Change the Uploads Path
- Troubleshooting
- Frequently Asked Questions
- Will my existing images break when I change the uploads path?
- Does this work with a CDN?
- Should I also change the wp-content path?
- Does this work with WooCommerce product images?
- Will old image URLs still work? What about links from external sites?
- Will changing the uploads path affect my image SEO?
- Does WP Ghost physically move my uploaded files?
- Related Tutorials
Hide your WordPress media file structure by changing the uploads path with WP Ghost. Every image on your site tells a story in its URL. A path like /wp-content/uploads/2025/03/photo.jpg confirms WordPress, reveals your directory structure, and even shows when the file was uploaded. Change it, and that entire trail goes cold.
What Is the Uploads Path in WordPress?

The uploads directory (wp-content/uploads) is where WordPress stores every media file you upload through the admin panel: images, videos, audio files, PDFs, and any other documents.
By default, it sits at: https://yourdomain.com/wp-content/uploads/
WordPress organizes uploaded files inside this directory by year and month. An image uploaded in March 2025 gets stored at /wp-content/uploads/2025/03/image.jpg. This structure keeps things organized as your media library grows, but it also creates a predictable, crawlable path that reveals information about your site.
Here’s what makes the uploads directory unique compared to other wp-content subdirectories: its URLs appear in your public content. Every image in a blog post, every PDF download link, every video embed – they all contain the /wp-content/uploads/ path right there in your page HTML. That means visitors and bots see these URLs on every page. It’s the most publicly visible WordPress path on your entire site.
Why You Need to Secure the Uploads Path
Because your media URLs appear on every page that contains images or downloads, the uploads path is one of the most exposed WordPress fingerprints. Here’s what’s at stake as part of your hack prevention strategy:
It’s a WordPress fingerprint that lives inside your content. Unlike /wp-admin/ or /wp-includes/ (which appear in admin areas or asset references), the uploads path shows up inside your actual posts and pages. Every featured image, inline photo, and media embed contains /wp-content/uploads/ in its URL. Theme detectors and scanners use these content-level URLs to confirm WordPress before they even check headers or scripts.
Directory browsing can expose your entire media library. If directory listing is enabled on your server (more common on shared hosting than you’d think), anyone can navigate to /wp-content/uploads/2025/ and browse every file uploaded that year. That includes images, documents, and any files you assumed were only accessible through direct links.
The uploads directory is a common target for malicious file uploads. WordPress exploits frequently target the uploads directory because it’s writable by design. The infamous WordPress File Manager plugin vulnerability (CVE-2020-25213, CVSS 9.9) allowed unauthenticated attackers to upload and execute PHP shells in writable directories. Changing the path doesn’t prevent upload vulnerabilities directly, but it breaks automated scripts that target the known location.
Image URLs reveal your publishing timeline. The year/month structure tells anyone when you started publishing and how active you are. Not a direct vulnerability, but it’s reconnaissance data. The less attackers know about your site, the harder it is to target.
Combined with changing the wp-content path, the plugins path, and the themes path, hiding uploads completes the security of your entire /wp-content/ structure.
How to Secure the Uploads Path with WP Ghost
WP Ghost replaces /wp-content/uploads/ with a custom path. Every image URL, media embed, and download link across your entire site updates automatically. No manual URL changes needed.
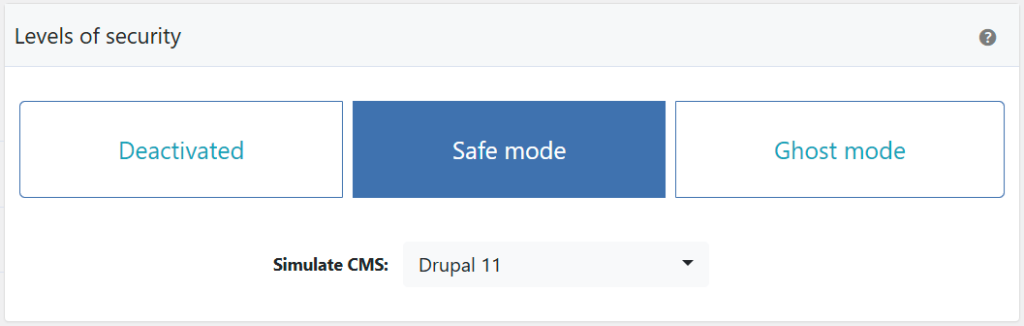
Activate Safe Mode or Ghost Mode
Before you can change any paths, one of WP Ghost’s security levels must be active.
- Go to WP Ghost > Change Paths > Level of Security.
- Select Safe Mode or Ghost Mode.
- Click Save to apply.
Need help choosing? Check the Safe Mode vs Ghost Mode comparison.
Change the Uploads Path
This replaces every visible instance of /wp-content/uploads/ across your site. Image URLs in posts, media library links, download URLs, RSS feed entries – everything updates to the new path.
- Go to WP Ghost > Change Paths > WP Core Security.
- Find the Custom Uploads Path field. A predefined name is already filled in.
- Enter a different name or keep the predefined one.
- Click Save to apply.
Important: Avoid names that suggest media storage, like “uploads”, “media”, “images”, “files”, or “assets”. Choose something unrelated and random.

Good to know: WP Ghost doesn’t physically move or rename any files. Your uploaded media stays in the same location on your server. WP Ghost creates virtual paths through URL rewrite rules. Deactivating the plugin restores all original URLs instantly.
Verify with a Security Check
After saving, run a scan to confirm the change is working.
- Go to WP Ghost > Security Check.
- Click Start Scan.
- The plugin verifies the uploads path has been changed.
- If everything works, the task is marked complete.

Quick manual check: right-click any image on your site and inspect the URL. If it shows your custom path instead of /wp-content/uploads/, the change is active. For everything the scanner checks, see the Security Check tutorial.
What Happens After You Change the Uploads Path
Save your settings and here’s what changes right away:
Every image and media URL across your site updates instantly. Featured images, inline photos, PDF links, video embeds – all now use the custom path. Where you used to see /wp-content/uploads/2025/03/photo.jpg, you’ll see /your-custom-name/2025/03/photo.jpg.
All existing images keep loading normally. This is the question everyone asks first. Your images don’t break. WP Ghost serves files from the original physical location through the new URL. Visitors see the new path. The server reads from the old one. Nothing breaks.
The WordPress fingerprint in your content disappears. Since upload URLs appear inside posts and pages (not just scripts or admin areas), this is the most content-visible path change you can make. Scanners looking for /wp-content/uploads/ patterns in your page HTML won’t find them.
RSS feeds and sitemaps update too. Image URLs in your RSS feed and image sitemap entries use the new path. If your SEO plugin generates image sitemaps, those reflect the change automatically.
Clear your cache after making this change. Cached pages still contain old URLs until refreshed. If you use WP Rocket, LiteSpeed Cache, or any other caching plugin, clear the cache right after saving.
Troubleshooting
Images not displaying correctly after changing the uploads path
Almost always a caching issue. Clear your browser cache, your caching plugin’s cache, and any CDN cache. If images still don’t load, check that your server’s rewrite rules are working. On Nginx servers, the rewrite configuration may need updating. See the theme not loading correctly guide for Nginx-specific instructions.
Media files showing broken links after the path change
On Apache servers with mod_rewrite, this works automatically. On Nginx, rewrite rules need to be added to your config file. WP Ghost generates the rules, but they need to be placed by your hosting provider. Check the Nginx setup guide or contact your host with the rules WP Ghost provides.
If you’ve lost access or something broke, check the emergency disable guide, use the rollback settings, or add a constant in wp-config.php to disable WP Ghost temporarily.
Frequently Asked Questions
Will my existing images break when I change the uploads path?
No. WP Ghost uses URL rewrite rules that serve files from the original location through the new path. Your physical files don’t move. Every image, video, and document keeps loading normally. If you see issues, it’s almost always a cache that needs clearing.
Does this work with a CDN?
Yes, but your CDN needs to know about the new path. If it’s configured to serve from /wp-content/uploads/, update that configuration. See the CDN URL Mapping tutorial for setup details. Most CDNs like Cloudflare, BunnyCDN, and KeyCDN handle this through origin pull rules.
Should I also change the wp-content path?
Yes. Changing just the uploads path still leaves /wp-content/ visible in the URL. For complete security, change the wp-content path first, then change uploads within it. That way the entire structure changes from /wp-content/uploads/ to something like /custom-parent/custom-uploads/.
Does this work with WooCommerce product images?
Yes. WooCommerce stores product images in wp-content/uploads. Changing the uploads path automatically updates product images, gallery thumbnails, and downloadable files. WP Ghost is fully compatible with WooCommerce.
Will old image URLs still work? What about links from external sites?
Depends on your settings. If you’ve enabled Hide WordPress Common Paths, old URLs return a 404. If not, they may still resolve. For external sites linking to your images, use the redirect images from old paths feature to redirect old URLs to new ones without breaking external links.
Will changing the uploads path affect my image SEO?
Images keep loading at the same speed and quality. If they’re indexed in Google Image Search, old URLs get replaced as Google recrawls. Resubmit your sitemap in Search Console to speed this up. The transition doesn’t hurt rankings.
Does WP Ghost physically move my uploaded files?
No. WP Ghost never moves, renames, or modifies any file. Your media stays in wp-content/uploads/. Virtual paths are created through rewrite rules. Deactivating WP Ghost restores all original URLs instantly.
Related Tutorials
Continue hiding your WordPress file structure:
- Change the wp-content Path – Hide the parent directory that contains uploads, plugins, and themes.
- Change the Plugins Path – Rename the /plugins/ subdirectory for plugin security.
- Change the Themes Path – Rename the /themes/ subdirectory to hide your active theme.
- Change the wp-includes Path – Hide the core WordPress library directory.
- Hide WordPress Common Paths and Files – Block access to default WordPress paths entirely.
- Redirect Images from Old Paths – Set up redirects so external links to old image URLs still work.
- Hide from WordPress Theme Detectors – Make your site invisible to CMS scanning tools.
- CDN URL Mapping – Configure CDN paths to work with your custom upload URLs.